Getting Started
In this article:
Connect Your Cloud File Storage
Connect Your Accounting Software
Manually Add Staff and Contacts
More on Leads, Quotes and Jobs
Welcome to Jobman!
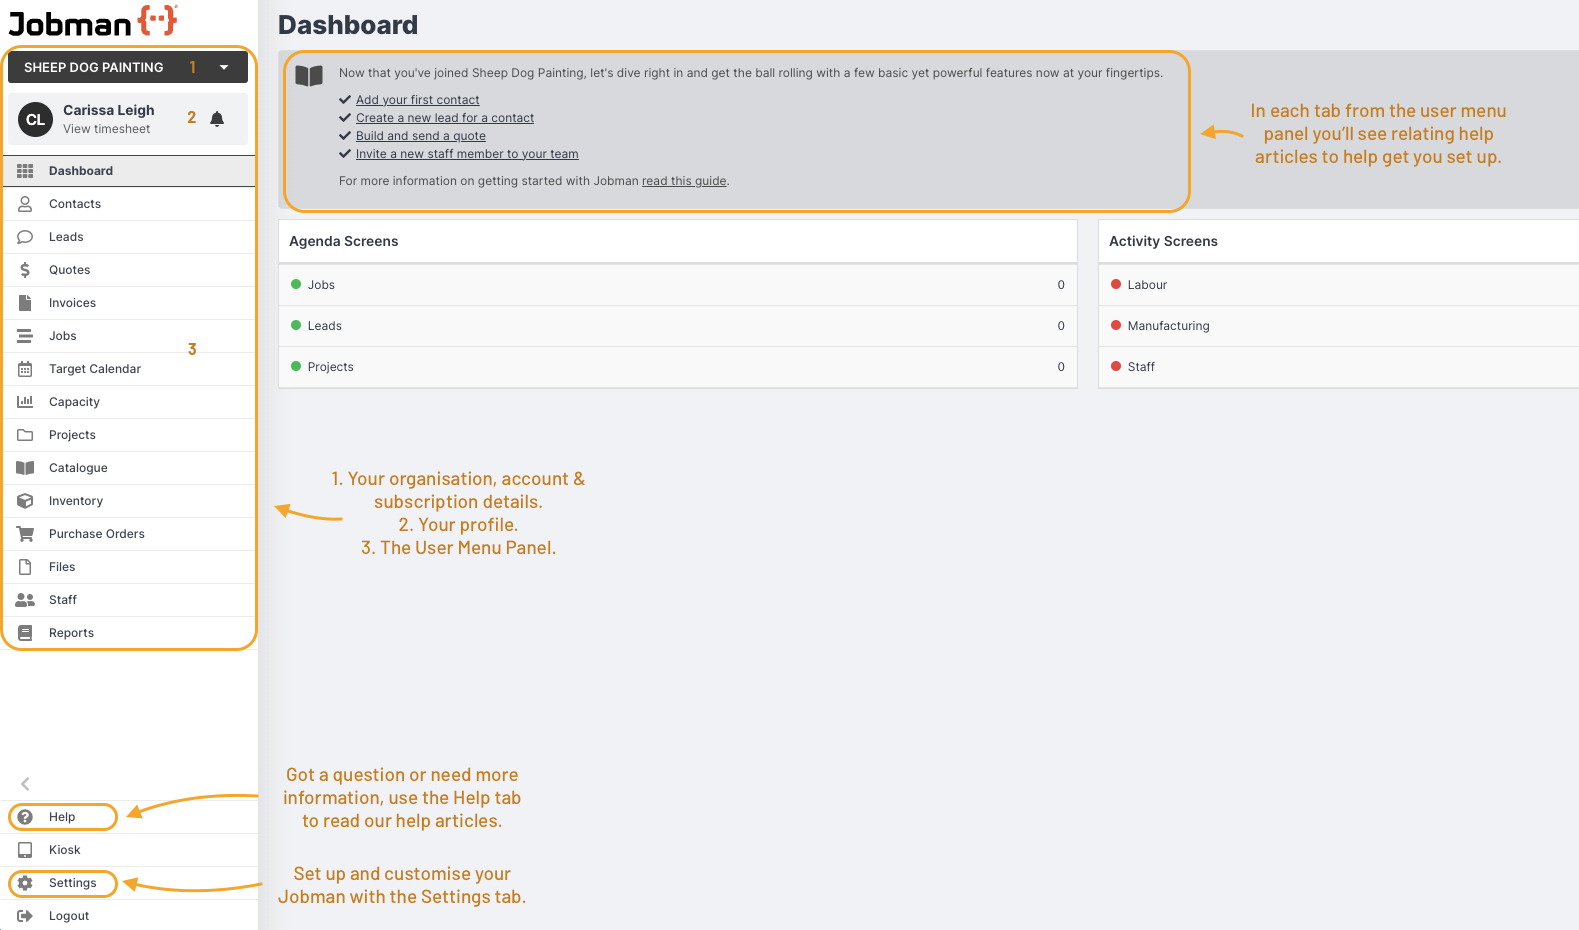
Now you've signed up and started your trial, let's go over the basics for getting your Jobman software up and running. Firstly, you'll be taken to your dashboard (see below).
See the setup flow guide here. This will help you visually understand the logical steps to take in setting up Jobman.
Migration Clients: Please follow the steps and information provided to you by our migration team.
Time to get your first win! Take a moment to personalise your Jobman and make sure your settings are correct. From the User Menu Panel, click Settings > General. Add your company information and logo, then continue below.
Please note: When uploading your logo, make sure the file size is less than 500kb.
Connect Your Cloud File Storage
Upload your files to Jobman to allow staff to access them from the office, factory, or even out on the road!
Note: It is important you connect with your cloud file storage before your accounting software, so all of your lead and job files are created.
Not Applicable? If you're not integrating with your cloud storage provider, please continue to the next step.
How to Connect Your Cloud File Storage
- From the User Menu Panel, go to Settings > Cloud File Storage.
- Check the Driver and Base Directory (File Name) are correct, or click Update to change them.
- Click Connect To.
- You will be redirected to log in to your cloud file storage. Enter your details and log in.
- You will be redirected back to Jobman. Save your settings, and you will now see a ✓ next to Connected.
|
|
|


For more information on Cloud File Storage set-up, click here.
Connect Your Accounting Software
If you've chosen to integrate with your accounting software, now is the time to set this up, as this will import all of your contacts, suppliers and staff, and allow you to sync invoices and bills.
Recommendation: Please ensure you have audited your accounting software to clear any possible duplicates so you don't end up syncing these to Jobman.
Not Applicable? If you're not syncing your accounting software, please continue to the next step.
How to Connect Your Accounting Software
- From the User Menu Panel, go to Settings > Accounting > Integration.
- Check the Driver and Settings are correct, or click Update to change them.
- Click Connect To.
- You will be redirected to log in to your accounting software. Enter your details and log in, then follow the prompts provided.
- You will be redirected back to Jobman. Save your settings, and you will now see a ✓ next to Connected. Your data will migrate in the background while you continue your set-up below!
|
|
|
|


|
|
|


We suggest having your automatic sync options ticked as shown below, to save having to enter information manually.

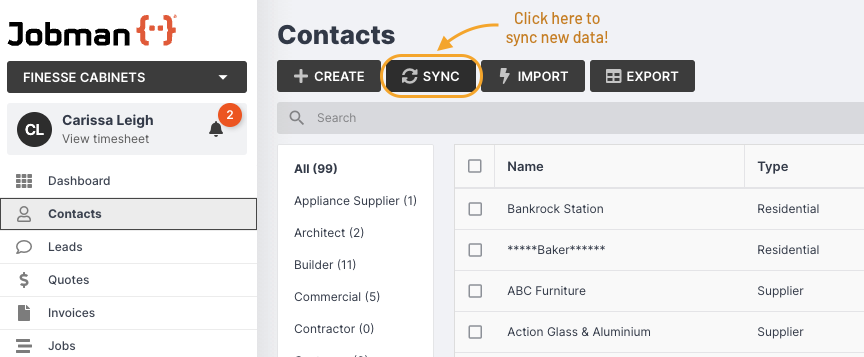
Syncing New Data
You can choose to sync your accounting software with your Staff or Contacts at any time.
For more information on connecting your accounting software, click here.
Manually Add Staff and Contacts
If you've chosen not to integrate with any accounting software, you will need to manually add your staff, contacts and suppliers. Depending on the number of staff/contacts you have, you can either enter these one by one, or import from a spreadsheet:
- Enter your contacts manually.
- Enter your staff manually.
- Import your contacts from a spreadsheet.
- Import your staff from a spreadsheet.
Once you've added all your staff, you can go to Staff from the User Menu Panel and click on an individual staff member to add further details about them if required.
Now is also the best time to set up Staff Roles if you intend on inviting staff to use Jobman.
Contacts Tip: When inside a contact file, you can create a lead, quote or job, and also send emails, all with the Create button.

Congratulations!
You've set up the basic parts of your Jobman software. We understand that not all business needs are the same, so if this is enough information for you to get started, go ahead!
Now you've got your contacts set up, you can start creating leads, quotes and jobs. See more on how these work by reading through the below articles:
| Leads | Quotes | Jobs |
| What is a Lead? | Create a Quote | Create a Job |
| Create a Lead | Create Quote Presets | Job Settings |
| Manage a Lead | Add Products to Quotes | Job Workflows |
| Item Specs for Leads | Apply Styles to Quotes | Job Work Orders |

|

|

|
Use our helpful tool tips located throughout the app, or read through our help documentation if you get stuck. If this doesn't work, lodge a support request and we'll aim to get back to you within 48 hours.
Want More?
We've got you. Jobman is an end-to-end ERP software solution for your business, so we want to give you all the necessary tools to set up your software and get the most out of it. Whilst Jobman comes with a lot of preset data, depending on which type of organisation you registered with, it is worthwhile taking the time to customise and add more data to suit your business and processes.
Read more: Settings Guide here.
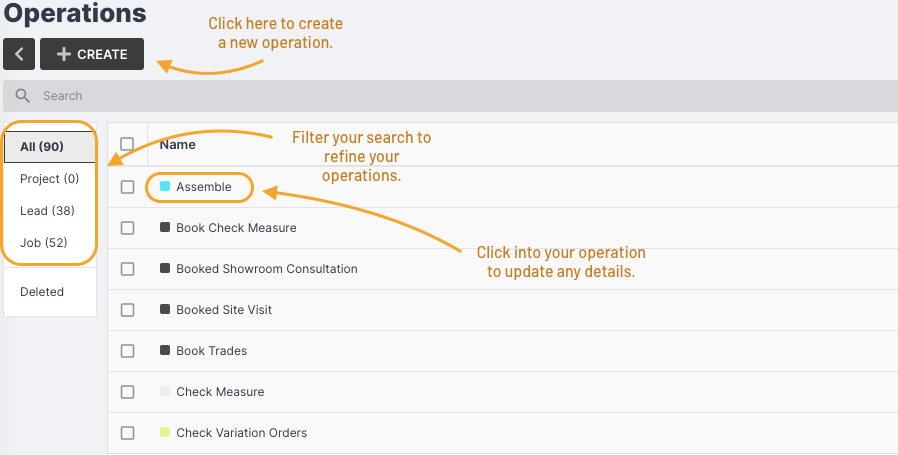
Operations
Operations are your internal processes that you want to track and map time against. Operations can be set up with costs, overheads, and profit margins, and are allocated against staff for them to log their time.
Operations are crucial for your Target Calendar and Agenda Screens to work.
Read more: Create and Maintain Operations
Important - For operations to work in your target calendar and agenda screens, you must set a target date for all relevant tasks in leads, jobs, and projects.
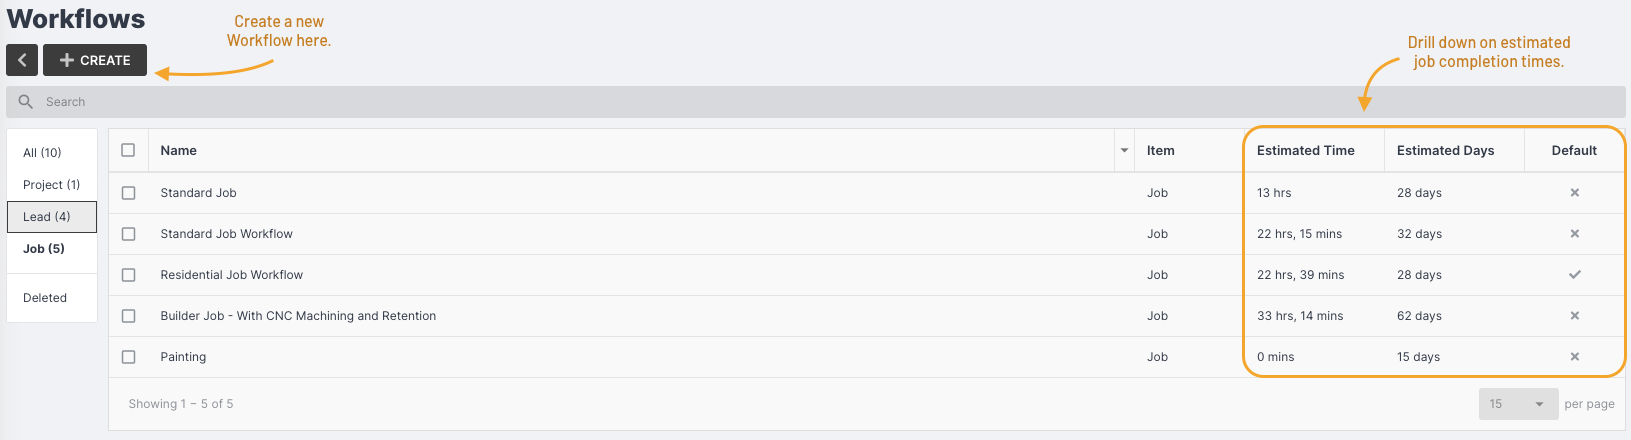
Workflows
Now you've set up your operations, it's time to add or update your workflows. A workflow is a business process, of which you may have many. For example: sales process, quoting process, assembly process, machining process, install process, and more. If you set up your workflows with the required tasks, you can allocate them to your staff members and track the progress of your leads, quotes, and jobs.
Read more: Edit or Create a Workflow
Next Steps?
Once you've set up the basics and begun tweaking the software to suit your business, read through some of the following documents for more information:
- General User Navigation - Learn how to navigate Jobman.
- User Customisation of Columns - How to customise your Jobman.
- Get Started with Kiosk Mode - For businesses with factory users.
- Release Notes - Keep up to date with our new feature releases and bugfixes.
- Tips & Tricks - Helpful tips to get you hitting goals quicker.
- FAQs - Read through some of our frequently asked questions.
Internal Tasks/General Operations
For tasks and operations that are not linked to a specific job or lead (eg: General Admin, Meetings, Cleaning Duties, Unpacking Truck, etc.) you can create a generic internal job. Allocating all staff to this agenda screen will allow them to log time against general duties to give you a more accurate payroll report.
Resources
Help Documentation - All of our help articles and how-to's.
Jobman Setup Flow Guide - For those who want to use Jobman to its full potential.
Training - One-on-one paid training sessions for specialist help.
Online Workshop Videos - Recordings of our workshop webinars, great for learning!
Jobman YouTube - Subscribe to keep up to date with our latest webinars and video tutorials.