Office Users How-To: Lead Management
In this article:
Leads Tab
Leads are prospective customers. A lead is generated from a contact, and follows the process of quoting through to creating a job. One contact can create multiple leads, and one lead can create multiple quotes and jobs.
To add or view your leads, simply click Leads from the User Menu Panel on the left:

From here, you can customise your column display, including sorting by ascending/descending order, adjusting column widths, dragging & dropping to move columns, and showing/hiding individual columns.
- Use the multi-select menu on the left to filter your leads by one or more lead statuses.
- Type in the Search bar to look for a specific lead.
- Use the drop-downs on the top-right to filter by any combination of lead type, member type, or member.
-
Delete one or more leads by selecting them using the checkboxes, then clicking With Selected > Delete:

-
View deleted leads:

-
Restore a deleted lead by selecting it and clicking With Selected > Restore:


Lead Progress Chart
From the Leads tab, click Progress Chart:

The Progress Chart will look something like this:

As with your Leads tab, you can customise your column display.
Your can also use the Search bar to look up an individual lead, or use the drop-downs to filter by lead workflow, lead type, lead status, member type, or member.
Your progress chart can be used to:
- Gain a quick overview of where all your leads are up to;
- Track unscheduled jobs;
- Identify tasks which are behind schedule;
- Quickly detect bottlenecks;
- Streamline your operations to boost productivity.
Generally, you will have the Status column enabled, which shows you what status your leads are currently sitting in.
You will then also have a column for each of your lead workflow steps, e.g "Pre-Sale", "Estimating", "Follow Up", "Quote Accepted", etc.
Note: While steps are linked to statuses, they are not necessarily the same.
For each of the step columns you have enabled, you will be able to see what task the lead is up to in that step:

These are colour-coded for quick reference.
- If the step is green (and blank), that means all tasks have been completed in that step.
- If the step is yellow, that means the target date for the task shown is today.
- If the step is red, that means the target date for the task shown is overdue.
- If the step is grey, that means the target date for the task shown is in the future or not set.
- If the step is white (and blank), that means there are no tasks in this step.
Creating New Leads
To create a new lead from the Leads tab, follow these steps:
- Click Create:

You will be taken to the Create Lead form:

-
Fill in the contact and contact person.
You can create a new contact and/or contact person on the spot if needed.
Note: for automation of processes, it is best to create leads directly from the contact, as shown in Contacts to Leads.
-
Choose a lead type, e.g. "Builder", "Residential", "Private", etc.
Lead types are extremely important, because your workflows will be set up so that certain tasks will only be relevant for certain lead types. For example, a "Builder" type lead will not require you to fill in an item specification form, whereas a "Residential" type will.
You can select more than one lead type from the drop-down if applicable.
You can click Add new type to create a new lead type on the spot.
You can also add or change lead types after the lead has been created. For example, you may have a type set up called "Job Refused", which adds certain tasks to the workflow and removes others. You would only select this type once you had completed the first part of your normal lead process (i.e. creating and sending through a quote).
-
Add a lead description e.g. "Kitchen reno" (optional but recommended).
Jobman will automatically generate a unique lead number for each of your leads, so using lead descriptions is the best way to quickly differentiate between leads internally.
-
Add any lead items (e.g. "Kitchen", "Bathroom", "Laundry").
Lead items are extremely important for automating your data flow. A lead item is anything your business sells that can contain one or more products or specifications. If you are a cabinet-maker, your items will generally be rooms (e.g. "Kitchen", "Laundry"), which contain a number of products (e.g. "Base 1 Door Cabinet").
Lead items will become quote items, and then job items.
- Choose the relevant lead workflow. In most cases this will be the default lead workflow set up for your organisation, and will automatically modify depending on what lead type(s) you have selected. However, some particular lead types may require you to select a different lead workflow.
- Under Location, you can either tick the box to use the same site address details as the contact, or you can fill in the specific site address details for this lead. Again, using the example of the builder, each of your leads (customers buying a home from the builder) will have a unique site address.
- Add any other important information in lead notes.
-
Use the Members drop-down to add the relevant staff person for each lead member type your organisation has set up, e.g. "Salesperson".
Members of a lead will receive notifications related to that lead, e.g. when an email is received, or when a quote is accepted or rejected.
Member types are configured by your business administrator, and can automatically assign staff to specific tasks in the lead workflow. For example, you will likely have a lead member type called "Salesperson" (or equivalent). When a lead is created, you can allocate a particular staff member as the "Salesperson" for that lead, and automatically assign them all of the relevant tasks for that lead. This will help your sales team keep track of who is in charge of which tasks.
- Fill in any lead details your organisation has set up.
- Click Create.
Note: Depending on how your organisation has configured your lead settings, some fields in the Create Lead form (for example, certain lead details) may be required. If so, you will not be able to create your lead without filling in these fields.
Overview of a Lead
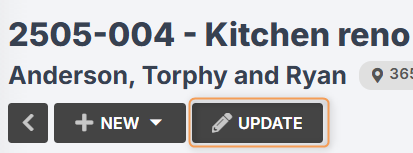
From the Leads tab, click into any lead to view it:

By default, you will be taken to the Dashboard, where you can view the lead progress bar, any pending tasks, active quotes, notes and activity.
-
The orange tag at the top tells you what status this lead is in:

Click this tag to quickly change the lead status.
-
The grey tag with the currency symbol tells you how much value this lead has. This is determined by the total value of quotes generated from this lead.

(Please Note: a quote will only count towards this total if it is in a quote status that has value. Read More)
-
The other grey tag tells you what lead type(s) are attributed to this lead.

-
The tag with the exclamation point tells you what priority level this lead has. Higher priority leads need to be actioned more urgently than lower priority leads. Depending on your organisation's settings, this tag may be any colour. (Read More)

Click this tag to quickly change the priority level. You can also create a message in the relevant agenda screen to alert members that the lead priority has changed, and why!
-
Click Update to change the lead contact, contact person, type(s), description, location, notes, members, or details.

You can also update the lead number, but this is not recommended. Lead numbers are generated automatically, and if you want to use your own numbering system, you will need to update each lead number manually after creation.
Changing or adding new lead types is especially useful, because you can quickly bring certain tasks into your workflow if things change.
For example, if you have linked your operations related to losing a lead to a type (e.g. "Lead Lost"), the tasks contained in this operations will not appear on your task screen, agenda screen or target calendar until you make the decision to bring them into the workflow, so that you can close the lead and report on why it was lost.
-
The progress bar gives a quick percentage estimate of how close the lead is to completion (e.g. all tasks in the workflow are completed). If the progress bar is red, that means some tasks in the workflow are overdue.

-
Pending tasks gives you a quick look at what task needs to be completed next in the workflow.
Click the three-dot menu next to a task to start/pause/stop, set progress, mark completed or mark N/A.

-
View the activity log for information about when the lead was created, updated, etc., and by whom:

- View and add, edit or delete notes:


Information:
There are different areas where notes are stored in leads, jobs, etc.
Notes added directly to the Dashboard are visible on the Dashboard only.
Notes added when creating or updating a lead (i.e. in the Create Lead form) are visible in the lead Info tab:

Notes can also be added to individual tasks.
All notes added to the Dashboard, Info, tasks, etc. are also visible in the Kiosk, assuming the Kiosk user has the necessary staff permissions to view notes. This is a great way for the office staff to communicate quickly and effectively with the factory and installation staff!
Lead Info
Click Info to view the lead contact, contact person, site address, notes, items, details, workflow, and members:

- Click the three-dot menu next to Members to add or remove members for this lead:


-
Click on the contact to be redirected to the contact info page in Jobman:

-
Click on View map or Get directions to open the site address in Google Maps:

-
Click on any of the lead items to view its specifications in a pop-up window:


Lead Tasks
Click Tasks to view the lead workflow and all the steps and tasks contained within it:

Statuses, Steps, and Tasks
Statuses give you a quick glance at where your lead is up to - i.e., are we in the discovery phase? The quoting phase? And so on. Leads will automatically move to the next status when all the tasks for the current status are completed. Often, a status will determine what actions you can and can't take - for example, you cannot create a job from a lead unless it is in the "Quote Accepted" status (or equivalent). Learn More
Steps are designed for when you might have several tasks that apply to the same status, but you want them separated. For example, you may have a lead status called Estimating, which is broken into two steps:
Step 1 - Quoting Phase
Step 2 - Revision Phase
Each step then contains one or more tasks, e.g. "Discovery Call", "Quote", "Quote Revision", "Quote Accepted", etc.
-
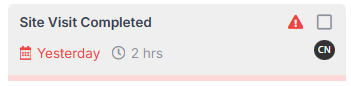
Any overdue tasks will be marked with a red ! icon:
-
Any completed tasks will be marked with a tick, and show the name of the person who completed the task:

-
Any N/A tasks will be greyed and crossed out:

You can toggle Hide N/A to have N/A tasks removed from view altogether:

-
If any members have been assigned to a task, you will see their initials on the task:


Add new tasks on the fly when something is required for the lead that isn't already covered in the workflow:

Click the three-dot menu next to the workflow to either save as workflow (if you have made modifications to this workflow and would like to save this workflow to use again for future leads), or to change workflow:

When changing a workflow, any tasks marked complete or N/A will remain as they are.
Use the tickboxes to select one or more tasks, then use With Selected to mark complete, mark N/A, unmark N/A, or delete:

Use the Search bar to highlight specific tasks:

Click on any task to view the task summary and perform any task actions:

Important: Always make sure to set start or target dates to get the most out of your agenda screens, capacity planner, and target calendar!
(For more information about tasks, see Getting Started - Tasks.)
Lead Resources
Click Resources to view files, invoices, items, jobs, and quotes linked to this lead:

Lead Emails
Click Emails to view and send emails to this lead:

- You can see emails that others in the team have sent to the lead, and view the lead's replies.
- As long as the initial email in the chain has been sent from Jobman, all emails in the chain will appear in Jobman, regardless of whether they have been sent/received in another email client, e.g. Outlook.
- Easily keep the conversation moving when other members of your team are away.
- Create email templates to quickly send leads a pre-formatted message and minimise time spent!

Learn more about email templates
If you have set up automatic emails to be sent to the lead when certain tasks are completed, these will show in your Sent emails, and any replies from the lead will show in your Inbox:


Managing a Lead
When in a lead, the main actions you will use are:
Emails - see previous lesson.
Tasks - see previous lesson.
Additional Contacts
A lead will always originate from a single contact. However, once created, you can add contacts to an existing lead - such as installers, builders, or other service providers.
Before you start:
- Make sure you have set up your Contact Roles.
- Add the organisation to your contacts if you haven't already.
- Within the organisation's contact page, add the relevant persons and their details.
Then, follow these steps:
- Open your lead and click the three-dot menu at the top-right (see below).
-
Click Additional Contacts.

-
A pop-up will appear, showing all current contacts. Click Add Contact.

-
Choose the relevant Contact, Role, and Person.


You should now see the contact/person you added in the Info tab:

Item Specifications
When you create a lead, you may add one or more lead items, e.g. "Kitchen", "Bathroom", "Laundry" (if you are a cabinet-maker).
These items can be found in the Info tab, or the Resources tab.
Each item will have a specification form, where you can enter all the information about what your customer wants for their specific kitchen, bathroom, etc.
Item Specifications - Vital for Customer Success!
When your sales team engages a client, there is often no digital place to store all the key information about what a client is looking for - i.e. the colour of the doors in the kitchen, type of hinges to use, handle range selected, stone or corian benchtops, etc.
No matter how good your sales rep is, they will never remember all this information, and passing that information onto the team is even harder. Companies relying on sticky notes or email chains quickly lose this information, bogging down the entire sales process.
More importantly, it isn't just the sales team that needs this information. Item specifications are also necessary for the estimating team, design and draft team, right through to the manufacture and installation teams. Having a digital place to store this information, and having it follow the entire life cycle of the job minimises waste, improves efficiency, and adds huge profitability to every job.
To fill in an item specification form, go to Lead > Resources > Items, and click on the item:

Click Update, fill in the information as needed, then Save Changes:


Live Documents for Maximum Transparency!
Any changes made to lead item specifications at any point in the lead or job process will be updated throughout your Jobman software. So if a customer changes their mind about something, the sales team can make this change to the lead item specifications, and the change will be visible in both the lead and job for all the team to see.
You can click the three-dot menu at the top-left of the item to copy or delete it:

Copying an item can be useful if you need to create a similar item. Simply update the copy, make any changes needed, and Save.
You can also click PDF to download the item specification form (and any information filled in) as a printable PDF:

You can add items to your lead by going to Lead > Resources > Items and clicking Create:

You can create and update item specification forms by going to Settings > Items > Specifications. Read More
Creating from a Lead
If you click the New button at the top of a lead, you can create an invoice, item, job, or quote for that lead:

Our recommended process is:
- Create a quote from the lead.
- When the quote is accepted, create a job from the lead, and link the accepted quote.
However, some businesses may need to create a job straight from the lead, so this option is available in Jobman. Please note, however, that if you do this, some of Jobman's automated processes will not work correctly (e.g. quote items will not carry over to jobs or invoices), which means you will need to enter your data manually.
More on creating quotes will be covered in the next module.
In the meantime, let's assume you have a lead with an accepted quote, and look at creating a job.
Leads to Jobs
To create a job from a lead with an accepted quote, the lead status must be set to Quote Accepted or Job Won (or equivalent).
Simply click into your lead once the quote is accepted, and click the lead status to change it:


Once this is done, click New > Job:

A window will pop up, showing the Create Job form:

-
Choose the relevant job type(s) (these will usually match your lead type/s).
As with lead types, it is crucial to select the correct job types, as these will affect which tasks are brought into your workflow. You can also add/remove job types later if needed.
- Add a description (optional). This can be useful for internal referencing, e.g. you might use a custom job number, the job site address, the name of the builder, etc.
- Select the accepted quote(s) from the drop-down. This is required for full data automation, e.g. carrying quote items, materials, values and invoices to the job.
- Select the relevant job workflow for this job type(s).
-
Under Resources, you can select or de-select Copy lead items to Job and/or Copy lead files to Job.

In most cases, you will not need to copy lead items to your job, because this will be done automatically if you have added your lead items to your quote, then added your quote to the job.
However, some companies do not fill out individual item specifications based on room. Instead, they fill out one master specification for the whole job. For these companies, they will still quote in rooms, but it doesn't make sense to link the specification to one room (as it applies to the whole job). For these companies, it is better to copy the items from lead to job without fear of duplication.
If you do not want your job management team seeing sensitive information such as contracts or pricing, you may not want to copy lead files to your job.
Note: Jobman will remember your preferences the next time you create a job.
-
If you have job member types set up, you can select staff from the relevant drop-downs to assign as members:

This is useful to automatically assign relevant workflow tasks to the correct staff.
You can also add job members later, if desired.
- Click Create.


You will be redirected to your newly created job.
