How to Create Styles and Range Options to Apply to a Quote
Easily apply your styles and ranges to a whole quote or to individual sections. Create your products and update your styles to suit individual clients or customer needs. Create ranges based on quality and price, such as "Premium Range," "Mid Range" or "Basic Range," for quicker and easier quoting.
To set up your styles, you need to follow the below steps in order:
Step 4 - Create Components and Limit to Style Options (External Article)
Step 1 - Create Items
A style item is a product part that can be modified according to the style. For example, you might have a style item called "Door", because your products can have different styles of doors (e.g. painted, or pre-finished board).
-
Go to Settings > Catalogue > Styles > Items.

-
Click Create.

- Name your item (e.g. "Door").
- Click Create again.


You can click into an existing item at any time to edit or delete it.
Tip: Make sure to set up all items needed for a style before moving to the next step.
Step 2 - Create Options
A style option represents the different materials that a customer can choose for their product part. For example, if you offer cabinets with painted doors or pre-finished doors, you would create two different style options, e.g. "16mm Natural PFB" and "2pac Paint".
-
Go to Settings > Catalogue > Styles > Options.

-
Click Create.

- Name your option (e.g. "Door -16mm Natural PFB").
- Under Items, choose All or Selected.
- If you choose Selected, an drop-down menu with all your items will appear. Click on each item that you want your option to apply to.
- Finally, choose the corresponding Material from your catalogue and click Create.


Note: We recommend that the materials used in an option are set up as the brand "Quote Pricing" in your catalogue. Some materials may have a range of different options in either colour or size. Generally the colour won't change the price - however, material size will. Use Lead Item Specifications to list these particulars in a quote, rather than setting up multiple styles with the same price.
Step 3 - Create Styles
A style is a collection of preset items and options that represent a given price range for your product.
Depending on your business model, you may prefer to offer fully customisable products. However, if you find that lots of your clients prefer 2pac painted doors and fingerpull handles, it may save you time to create a style, e.g. "Premium", which will automatically apply the 2pac option to the doors, and the fingerpull option to the handles.
- Go to Settings > Catalogue > Styles.
-
Click Create.

- Name your style (e.g. "Deluxe Range"). Note: This name will appear on your quotes when used.
-
Using the drop-down menu next to each item, apply an option.

- Click Create again.


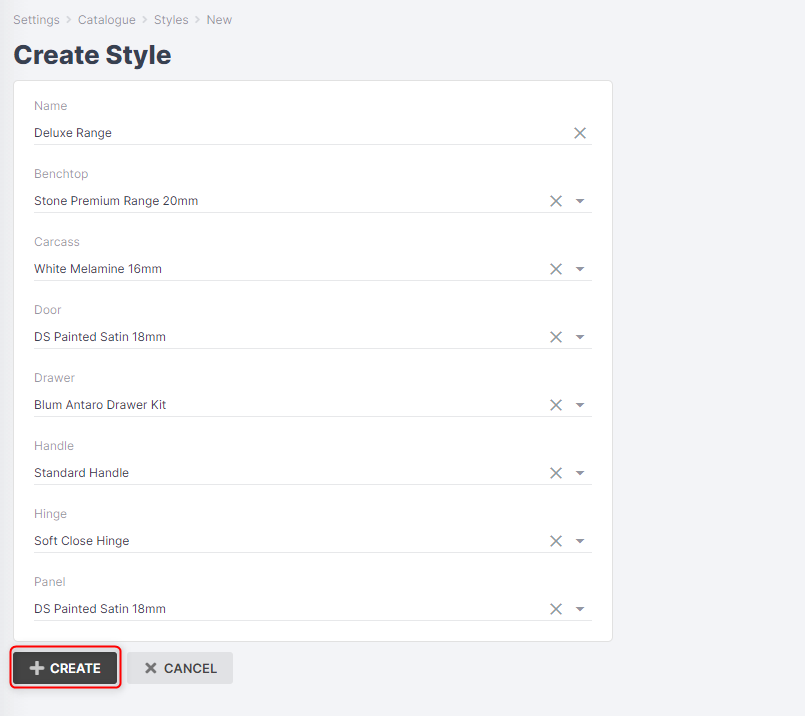
You will be shown a summary of your style and all its designated items and options.
When you apply a style to a quote, the items and prices associated with that style will be shown in that quote.
Step 4 - Create Product Components and Restrict to Style Options
To learn how to create product components and restrict to style options, click here.